Tag Archive | shading

More Shading Tips for Drawing!

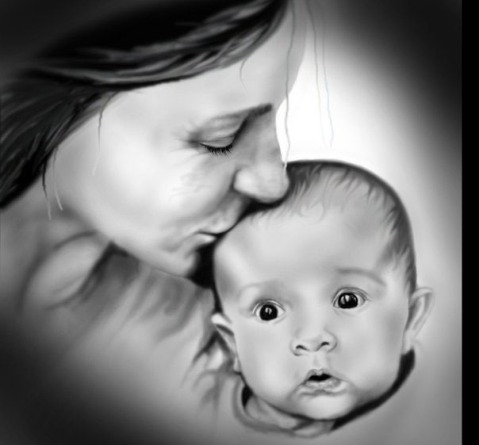
Whilst there are many important facets within the art world for artists to master, when pencil drawing, shading has definitely got to be a crucial skill to develop. Shading can make such a huge difference to any drawing; it can certainly make the subject stand out and affords the artist the opportunity to develop it more. There is a great deal that you can learn just by observing the environment around you but by following these five points, you will be able to start achieving maximum results.

* There is light and shade everywhere we look. If you have a computer for example, notice the shadow from your monitor on the wall. If you have a cup near you, notice the shadow that is cast from the handle. Look at the face of someone near you; notice if they have any shadows on their face, shadows caused by their hair? Alternatively, even under their chin?

* In order to bring your pencil drawing to life, shading has to be an integral part of your practice but in reality, your ability to be able to incorporate shading into every picture depends how good you understand how light works. As artists, we have to see the bigger picture, see how light and shade adds depth to our work.

* The technique of how to shade is of equal importance to being aware of light and dark is an important one to learn.

* The depth of your sensitivity when using the pencil is paramount as this can portray a much deeper, darker area when shading, or it can be too light. Shading does after all, range from blacks, dark and middle grey through to light. How much pressure you put through the pencil to shade in a specific area is very important.

* You also need to learn how to blend in your shading so that it looks like one stroke in contrast to many.

Of course the only way to become proficient at shading and blending is to practice. Take a thorough look around you and see other shading opportunities and after awhile, you will be extremely proficient in this important technique.

Are you able to bring your creativity on to your canvas? Will you take action step by step, if I help you to learn drawings and paintings until you succeed? Grab 6 lessons on Oil, Acrylic, Watercolor, Fabric Painting, Pencil Drawing, Color Theory.

Article Source: http://EzineArticles.com/1531064

Shading Techniques with Pencil Drawing

While learning to draw shaded pictures, there are some techniques that you need to follow and remember. Proper shading for the different objects is essential to draw reality to the images. If you are a beginner then here is a brief tutorial for you that make you familiar with the techniques of pencil drawing shading.

The blended shading: This is a popular method among the artists. It works by using graphite as the medium as it provides great results. You can use graphite to blend it easily with almost anything. You can use different types of materials to create desired effect and texture. You may use facial tissues to create shades for a flawless looking skin.

The circulism shading method: This is a much popular method of shading among the pencil artists. The idea in this technique is basically to draw small circles that intertwine and overlap among themselves. Creating a tone using this methodology can be a bit tedious but the results are certainly worth it. It helps in providing a real life skin texture to the images. You can use a light touch and a build up tone for this technique. In this, the graphite is blended in much smaller motions, in a circular manner.

The dark blacks technique: There are many artists who complain that it is too tough to get a dark back texture. It is true to some extent because, ideally graphite is not a good option for getting dark blacks. However, to create a darker tone using a graphite pencil, it is recommended that you use a SHARP 7B pencil. Press fairly hard and use the circular motion technique to get the desired effect of darker shades.

The loose Cross-Hatching: If you are an artist then you must have heard about this before. This is a quite simple yet effective method of getting an artistic look. The very fundamental idea of the crosshatching technique is to overlap the lines. This has to be repeated several times to get the desired results.

Learn from today’s expert how to paint and draw step by step with the help of pictures on your core subject whether it is oil, watercolor, acrylic, fabric painting, pencil, cartoon drawing, or digital art.

Article Source: http://EzineArticles.com/3392271

Pencil Portrait Montage Tips

A montage is somewhat like a collage. On one piece of paper you put together any number of related subjects. However, instead of pasting them onto the paper you will draw them.

A montage is often used to tell a story about the person you are drawing. It includes references to well-known events that happened in that person’s life and that were special to him or her.

Here are a few tips on how to go about putting together a montage:

Subjects

Do not overdo it. The subject surrounded by a few references will do just fine. It is easy to end up with a crowded montage that contains too many subjects and objects. So, be critical of what you put in it and of what you do not put in it.

Focal Point

Do not forget that the person who is being honored should remain the center of attention. Make sure you do not let the secondary drawings overwhelm the person who is being honored. A viewer should first and foremost see the honoree.

One way to ensure that your subject remains the focal point is to place him or her right in the center of your drawing. In addition, make sure that you use a smaller scale for the surrounding subject and objects. Another trick is to draw the surrounding object somewhat lighter and also with less detail. Reserve the full detail drawing for the person of interest.

Values

It is also important that you create an overall unity in terms of values. Often you will use a variety of photographs to construct your montage. These photographs will usually have different intensities and different light source locations.

So, before you start your drawing pay some attention to where you will put your darkest darks and lightest lights so that the final product has a consistent value distribution. If the values are not consistent throughout your drawing you will end up with a funny looking result.

This is particularly true if you show inconsistent cast shadows. Just imagine one light source and draw on your experience for how to change the shadows in your photographs so that they all go together in your drawing.

Sizes

The sizes of the subjects and objects in the different photographs will not be consistent either. So, some will have to be drawn larger than in the photograph and others will have to be drawn smaller.

Here is where the grid technique can be very helpful. By scaling the grid size you can fairly easily scale the subjects and objects as well. If the object is to be smaller on your drawing you can draw a scaled-down grid on drawing paper first as compared to the corresponding grid on your photograph. The same is true in reverse. You can easily increase the size of a subject or object by drawing a scaled-up grid on your drawing paper. This is the old grid trick which was used by many great masters of the past.

A montage can be a precious gift to the person who is being honored. Be forewarned however, that a montage usually involves a lot of work. Therefore, make sure you make a careful estimate of the time you will spend so you can charge accordingly if this is part of how you make your living.

Article Source: http://EzineArticles.com/1354829

Hand Drawn vs. Photoshop

I have today been to my local supermarket and picked up a leaflet promoting a caricature service that Tesco is now offering there customers.

Now I understand people are free to sell what they like, but i am of the thought that people are trying to jump on the caricature bandwagon and are really doing the industry serious harm. What these companies are in fact doing is NOT a caricature, but an image that is edited with photoshop filters there are other computer method which people are claiming are caricatures but these are not.

My much valued customers are now questioning our methods and indeed asking the questions if we are professionals, to which we reply “Yes indeed we are professional, our caricature are hand drawn by a professional artist.

Now how do professional like myself and others make themselves standout from these companies and protect the industry from these so call caricature artists. ?

I would like to see anybody who claims to be a caricature artist and does not produce these in the traditional hand drawn manner taken sued by the National Caricature network.

It should be a legal requirement that companies that are claiming to produce caricatures using computerized methods, should in fact using the correct working and I would like to see it as put in place that any companies that do not do this could be taken to court and sues for miss-selling the product they are offering.

Producing Caricatures is a skill that artists have trained all of there life for and to think that some one can get a computer package and claim to produce the same product is just not acceptable.

Drawing Digital

It goes without saying that you need to have an aptitude if you want to pursue drawing digitally. It is not an easy process and requires some kind of learning. Firstly, to be able to draw digitally you need the correct digital art software.

Photoshop

This digital software will allow you to draw digitally. It has many tools that will allow you to draw, paint, erase and create shapes. Get started initially with common shapes like a rectangle, circle. You can elaborate on these shapes and use your imagination to create drawings. You can begin withdrawing flowers, trees and other simple pictures. As you progress you will also be able to draw portraits and other intricate things.

Tool for drawing

Your primary tool for drawing would be the mouse. However, now a digital art tool called the WACOM tablet is also available that helps you to draw.

Brush: You will have to experiment with the correct brush to determine the best applicable for you. You have the option to change the size, type and behavior of the brush that you choose.

Eraser: Ditto like the brush, you have the options to choose from a set of erasers from the software. Even this has the option to change the size, type etc.

Burn tool/Dodge tool: With the Burn tool you can make your colours to appear darker. Conversely, you can choose the Dodge tool to make the colours to appear lighter.

Layers: This is one of the most unique tools in digital drawing which is not available in physical drawing. This function allows you to draw in layers. This can be explained like this – it is a transparent cell that allows you to work on every layer in such a way that you can either allow a layer to interact with the other layer or vice versa.

As you move towards drawing intricate things you can make use of the following options:

Grids: Using grids will help you to capture the drawing cleverly and easily. It will enable you to check proportions and placements etc.

Shading: Shading can also be used here like in physical drawing. It gives your photograph the characteristic of a physical drawing.

Color: When using colors, you need to take care that you make use of realistic colours.

Adding a Background: Giving a background to your picture is quite important. It helps you to give a story to your picture.

The most important feature of drawing digitally is that it gives you a chance to enhance your subject. It helps you to correct and add more to features. Sometimes, this can make your subject look unreal; therefore you need to take care that you do not take away the essence or personality of the subject in the drawing.

Conclusion

Drawing is an art and doing it within a digital ambit it gives the artiste the freedom to experiment and do a lot more with its subject. It is good if you try to learn about art before starting with digital drawings.